Documentation Index
Fetch the complete documentation index at: https://domoinc-arun-raj-connectors-domo-479695-remove-crime-report.mintlify.app/llms.txt
Use this file to discover all available pages before exploring further.
Intro
This article explains how to find and start creating content through Domo’s navigation bar and main menu and how to personalize your navigation experience.Access Domo’s Navigation
You can find Domo Navigation on the left side of your browser window from every screen in Domo—except full-screen editors like those in Workflows or App Studio.
Enable Navigation in Your Instance
If you are a Domo Administrator, you can enable or disable the navigation for all users or a specific group of users. Learn more about the Domo administrator role. To enable Domo Navigation in your instance, follow these steps:- Navigate to the Admin menu.
-
Under Features, select Feature management.

-
Choose one of the following settings:
- Not enabled in your instance — Disables the navigation for all users.
- Enabled for everyone — Enables the navigation for everyone in your instance.
- Enabled for admins — Enables the new navigation for administrators only.
-
Enabled for a specific group — Enables the navigation for a specific Domo group.
You can create a group with a specific subset of users to enable navigation, or you can remove them from a group to exclude them.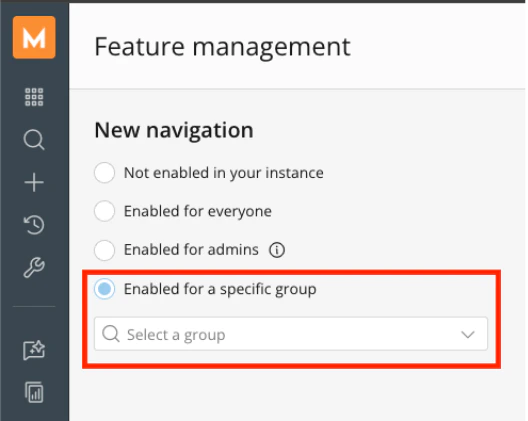
- Select Save to apply your enablement settings.
Lock the Navigation Bar
When the Domo Navigation is unpinned, it hovers over the rest of the screen. When you select the pin icon in the left corner of the expanded navigation, it stays in the fixed location and does not cover any part of the screen. To lock and unlock the expanded state of the navigation, select the pin icon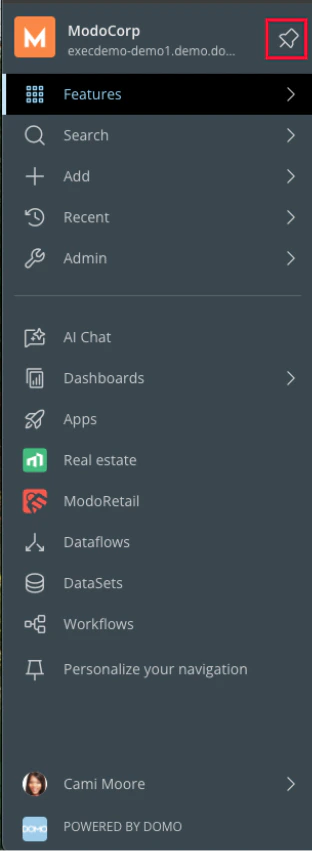

Note: After locking the navigation, it remains pinned throughout Domo until you select Close to collapse it.
Access and Create Content
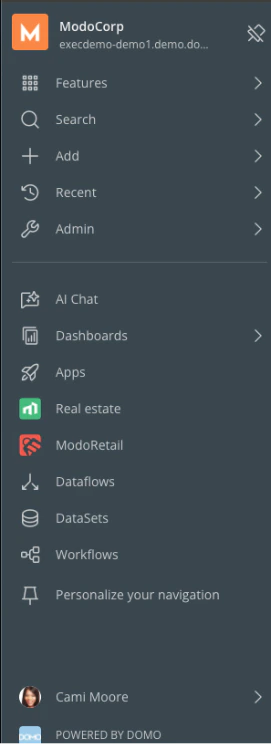
In the Domo navigation bar, you can view your instance’s logo, name, and URL, access and create content through the main menu, find your pinned items, and view your user profile.Find Your Instance’s Logo, Name, and URL
Your instance’s logo, name, and URL display at the top of the navigation.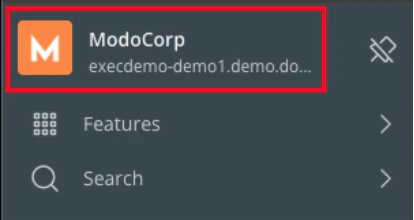
Navigate the Main Menu
You can navigate Domo’s features, create new content, view your most recent content, and access administrative tools in the main menu.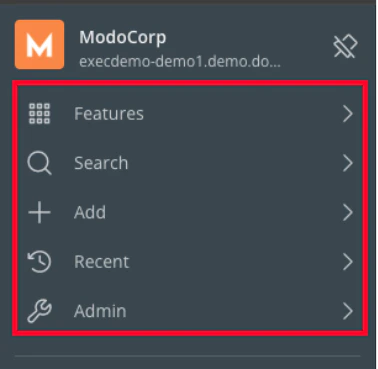
Find Features
Select Features to find all of Domo’s functionality by category.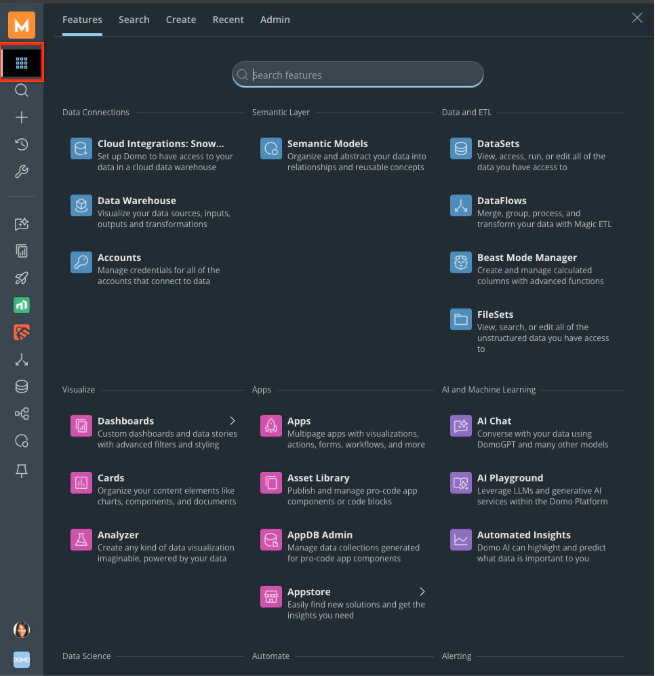
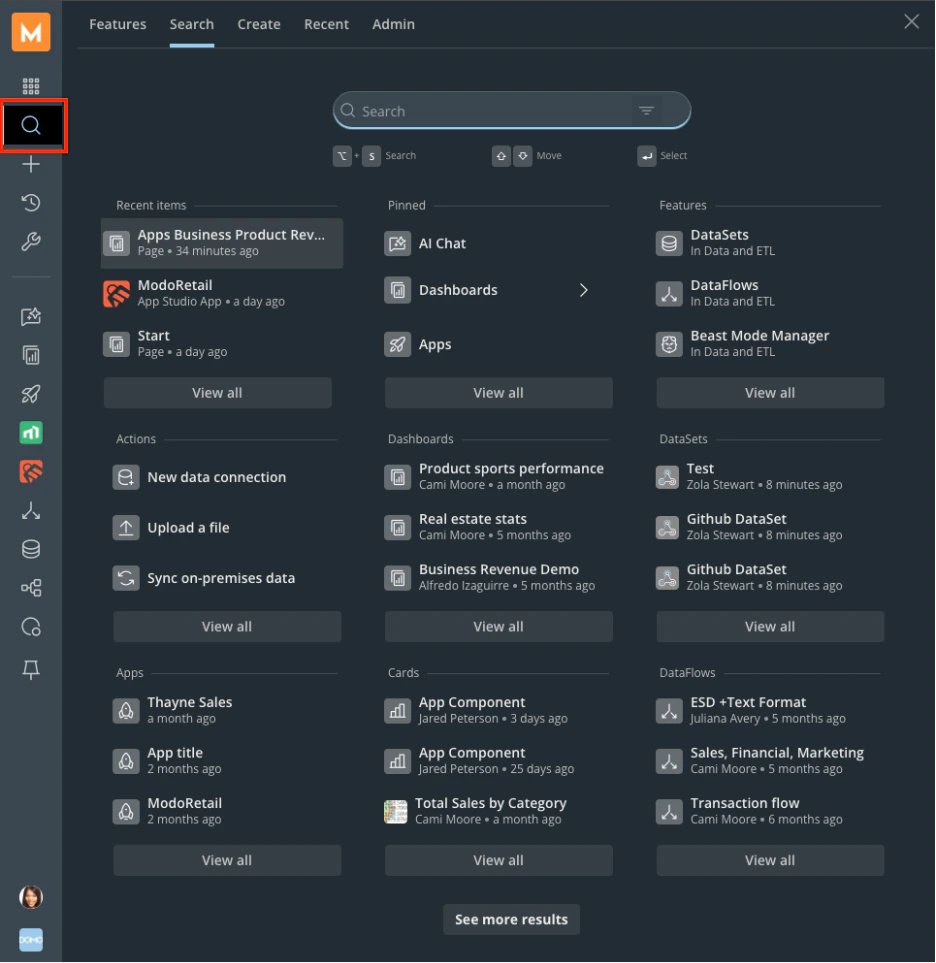
Search for Content
Locate any content in your Domo instance by typing a keyword into the Search bar. You also have the option to browse for content by specific feature.Note: The navigation’s search function prioritizes content you have previously visited.
Create New Content
Select Add to access the Create menu and build new assets such as App Studio apps, cards, datasets, workflows, and tasks. You can also connect and transform data, manage users and groups, and start conversations from this menu.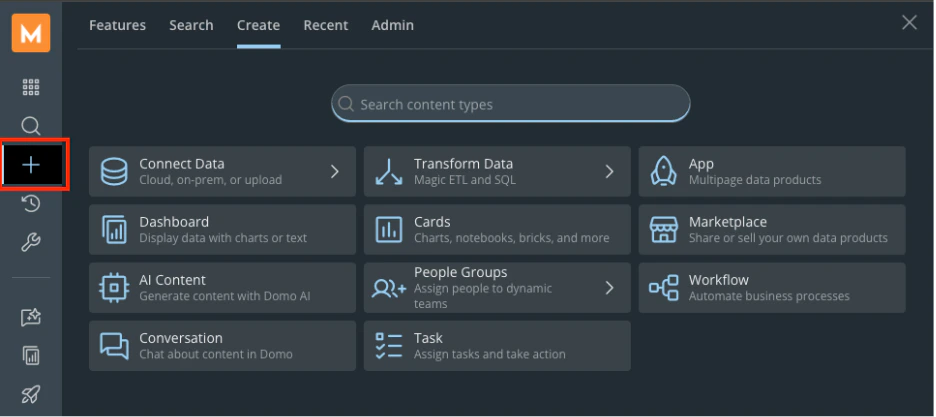
View Recent Content
Select Recent to access content and features you’ve worked on lately, organized by timeframe.
Access Administrative Settings
Select Admin to navigate all administrative tools, including governance, security, and feature management.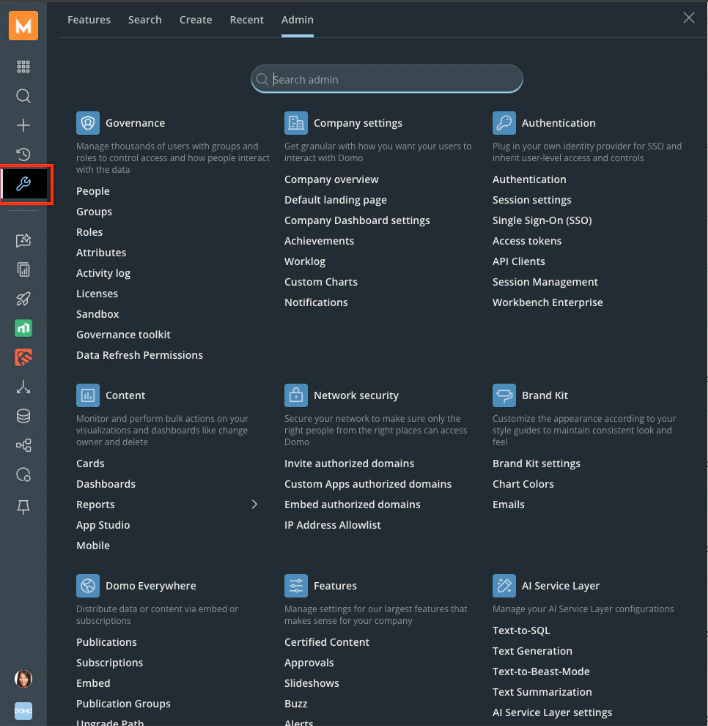
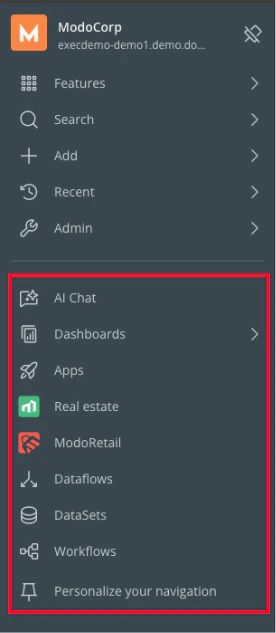
Find Your Pinned Items
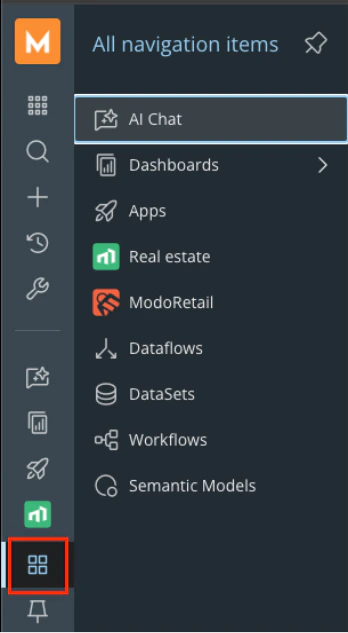
When you pin an item, such as a Domo feature, App Studio app, card, or link, it shows in the pinned items section of the navigation. Learn how to pin items to your Domo navigation.Note: When you pin multiple items, the navigation bar automatically adjusts. If the space is filled, you can access all your pinned items from a sub-menu, indicated by the All navigation items  icon. Select this icon to view the complete list and navigate to any of your pinned assets.
Open Your Profile
You can find personal settings and activity, including Account Details, Notifications, and Sign Out, by selecting the User Profile icon at the bottom of the navigation.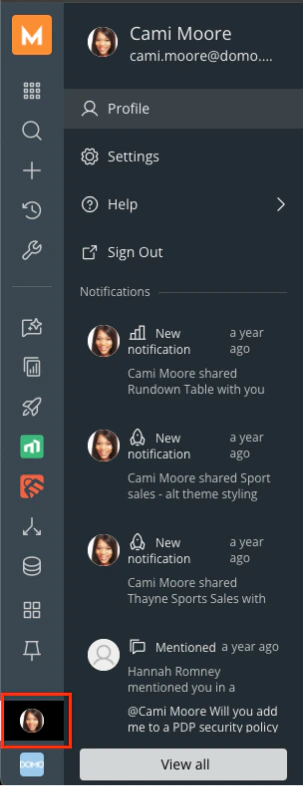
Personalize Your Navigation Experience
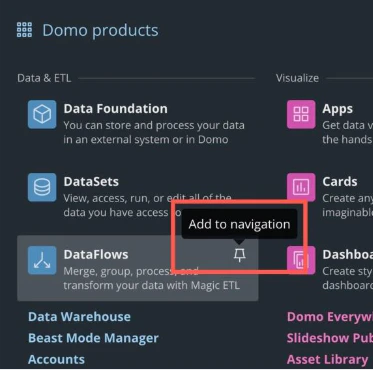
Pin your most-used features, like App Studio or DataFlows, or actions, like uploading a file or opening a card, to your Pinned Items navigation below the main menu.Pin Items
You can add any feature in the main menu to your pinned items by hovering over then selecting the Add to navigation icon . You can pin any number of items to your pinned items section. The new navigation scrolls as you add more items.
Personalize Your Navigation
You can pin any item in Domo to your favorites by following these steps:-
Select Personalize your navigation
 The Add item****to navigation modal opens.
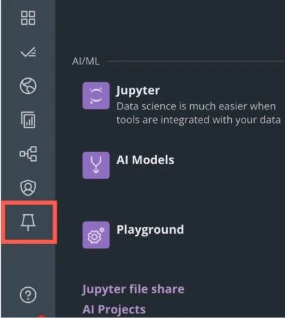

- Choose what action should take place when you select the item.
You can choose one of the following:-
Open Domo content — Choose the content to open and whether to open it in a new browser tab.
Give the navigation item a label, icon, and icon and background color.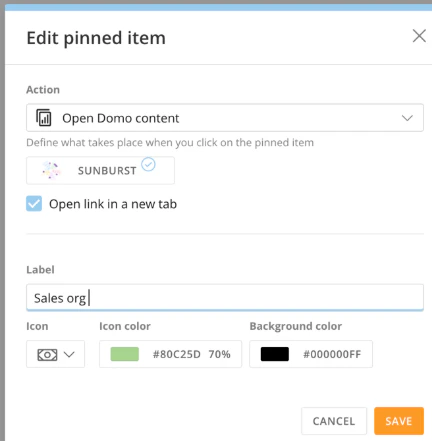
-
Open a feature — Choose the Domo feature to open and whether to open it in a new browser tab.
Choose an icon, icon color, and icon background color.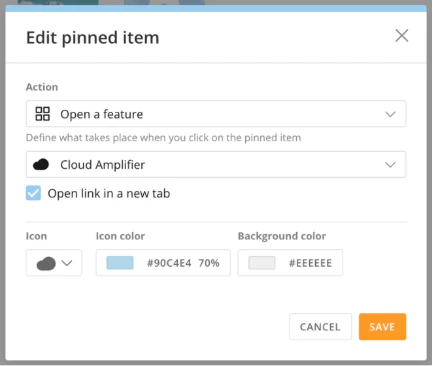
-
Perform an action — Choose what takes place when you select the icon. Options include uploading a file, creating a new ETL DataFlow, syncing on-premises data, and more.
You can choose whether to perform the action in a new browser tab and give the item a label, an icon, and icon and background colors.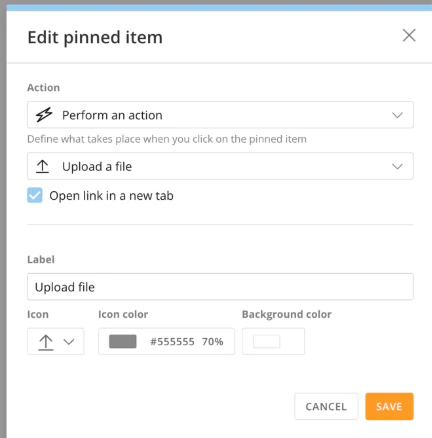
-
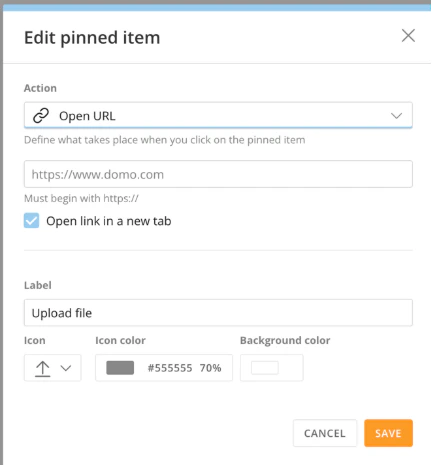
Open URL — Enter the URL that should open and whether to open it in a new browser tab.
Choose an icon, icon color, and icon background color.
-
Open Domo content — Choose the content to open and whether to open it in a new browser tab.
Note: The URL must begin with “https://”.
Edit/Unpin Items
You can edit the details for any item in your pinned items by accessing that item’s pin settings.-
Hover over the item and right-click it to open its pin settings.
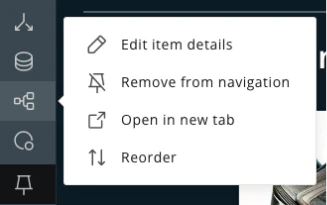
- Edit, remove, open, or reorder the item.
- Select Done to save your changes.